Route Azure Container Apps Traffic Through FortiGate
In this article, I will walk through how to deploy a Container App within a Container Apps environment, route all traffic through a centralized FortiGate firewall, and analyze the resulting traffic flow logs. We will also cover the configuration of Network Security Groups (NSGs), route tables, and virtual network integration as part of the implementation.
ToC
If you would like a deeper understanding of the differences between the Consumption and Workload profile tiers, I strongly recommend reviewing this article here.
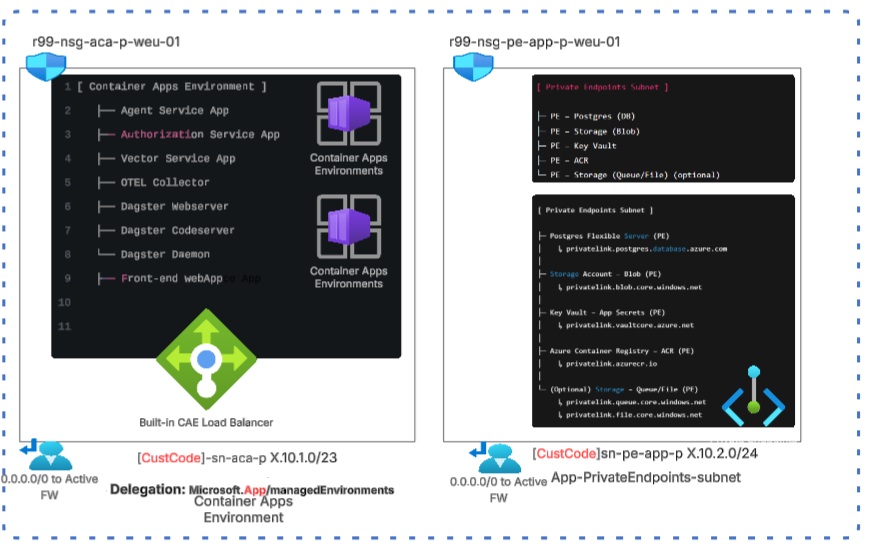
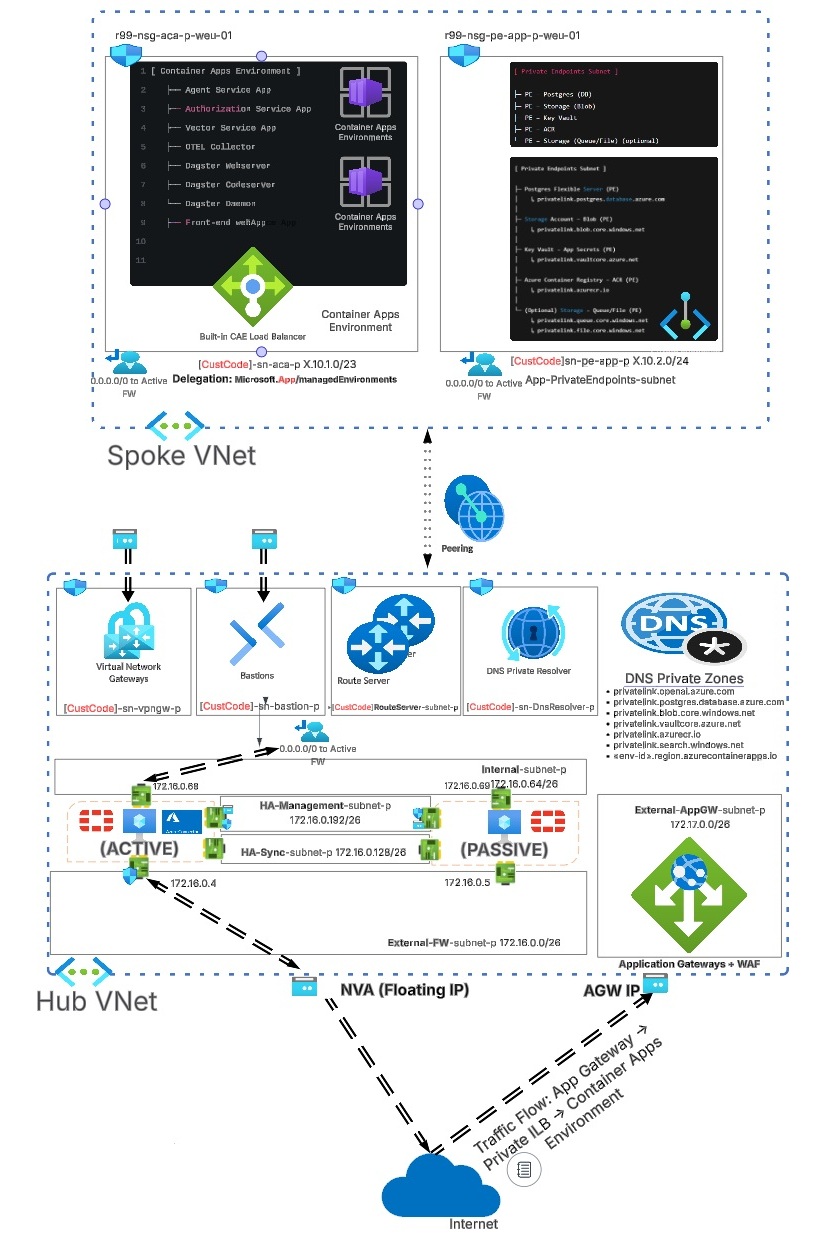
The overall architecture of our CAE networking is as follows: as you can see, the Container Apps environment is connected to the hub virtual network, where the firewall is deployed.
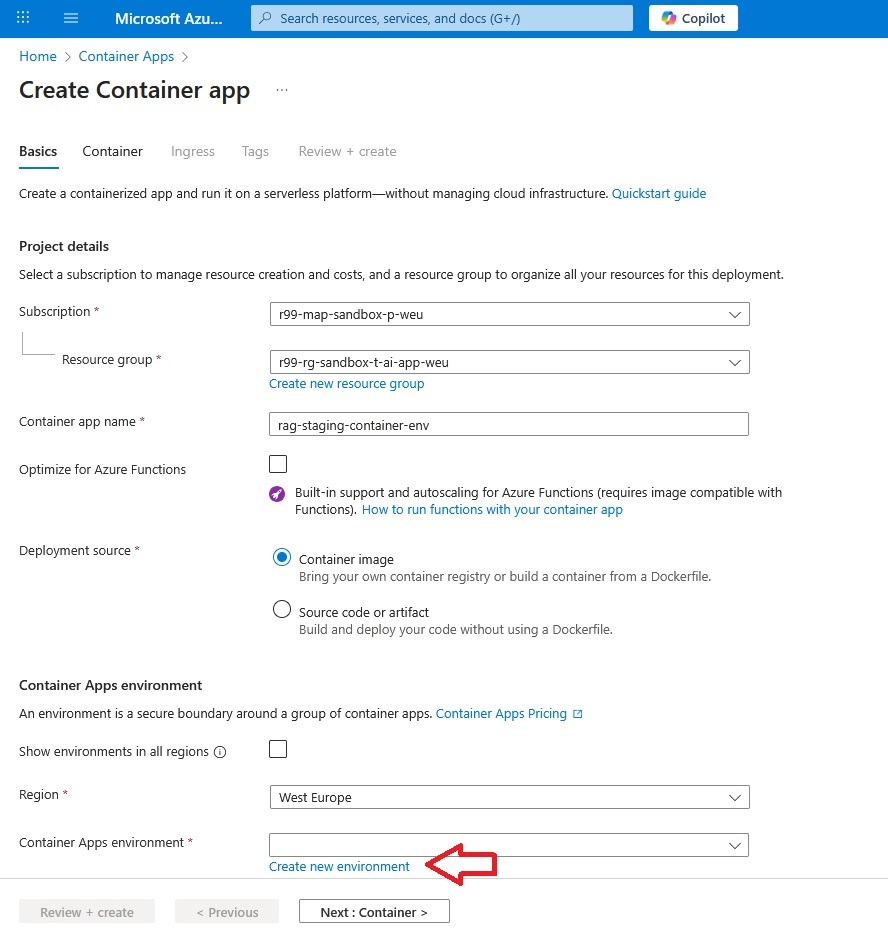
CREATE THE CONTAINER APP
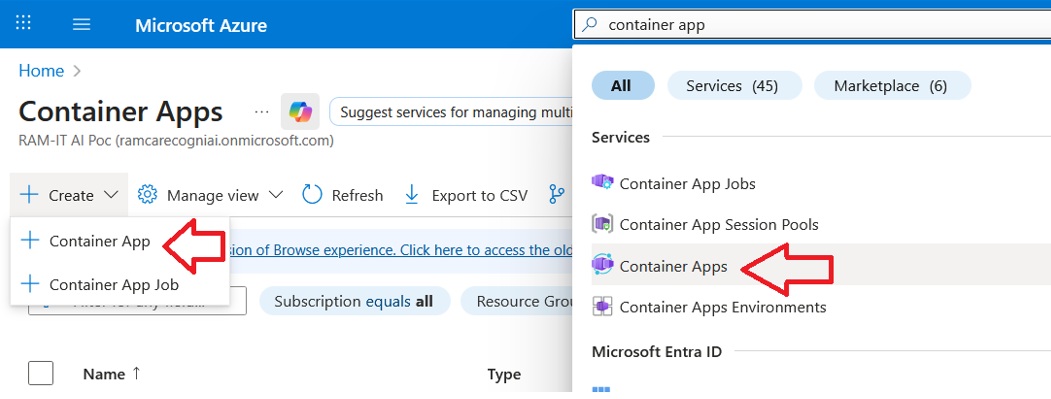
It is not possible to create a Container Apps Environment without first creating a container application. The first step is to locate Container Apps via the Azure portal search bar and create a new Container App.
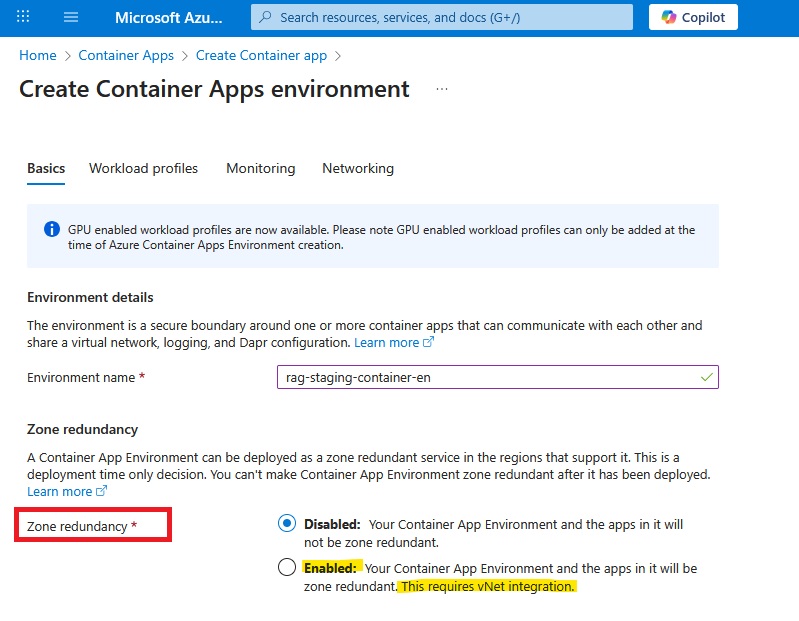
As shown in the screenshot above, advanced CAE features such as zone redundancy are available only when virtual network integration is enabled.
CONSUMPTION VS WORKLOAD PROFILES (PORTAL BEHAVIOR)
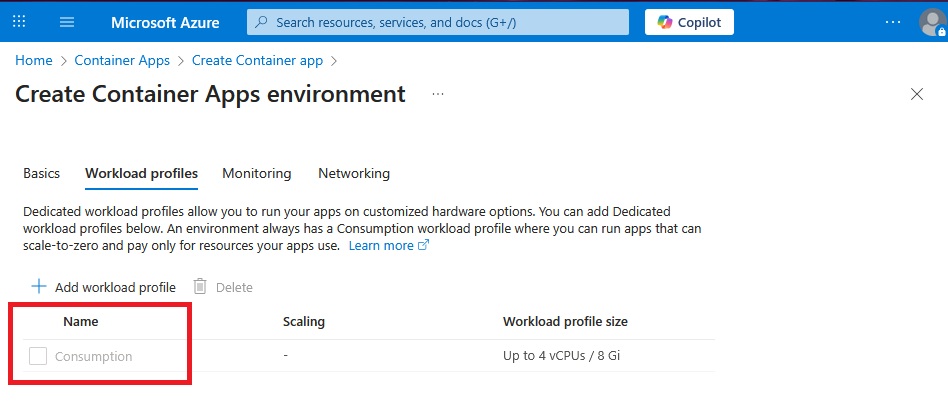
I often find the term “Consumption” confusing when it is used as the name of the default workload profile.
The key distinction is that Consumption is no longer a separate environment SKU; it is now a built-in workload profile within a Workload Profile–enabled environment. This is why the Azure portal always displays a Workload profiles tab, even when you intend to use only Consumption: the environment is based on the Workload Profiles control plane, but it initially contains a single profile called Consumption.
From this same screen, you can optionally add additional workload profiles with specific CPU and memory allocations (for example D4, E4, or GPU profiles) when your apps need predictable or higher capacity.
NETWORKING AND SUBNET DELEGATION
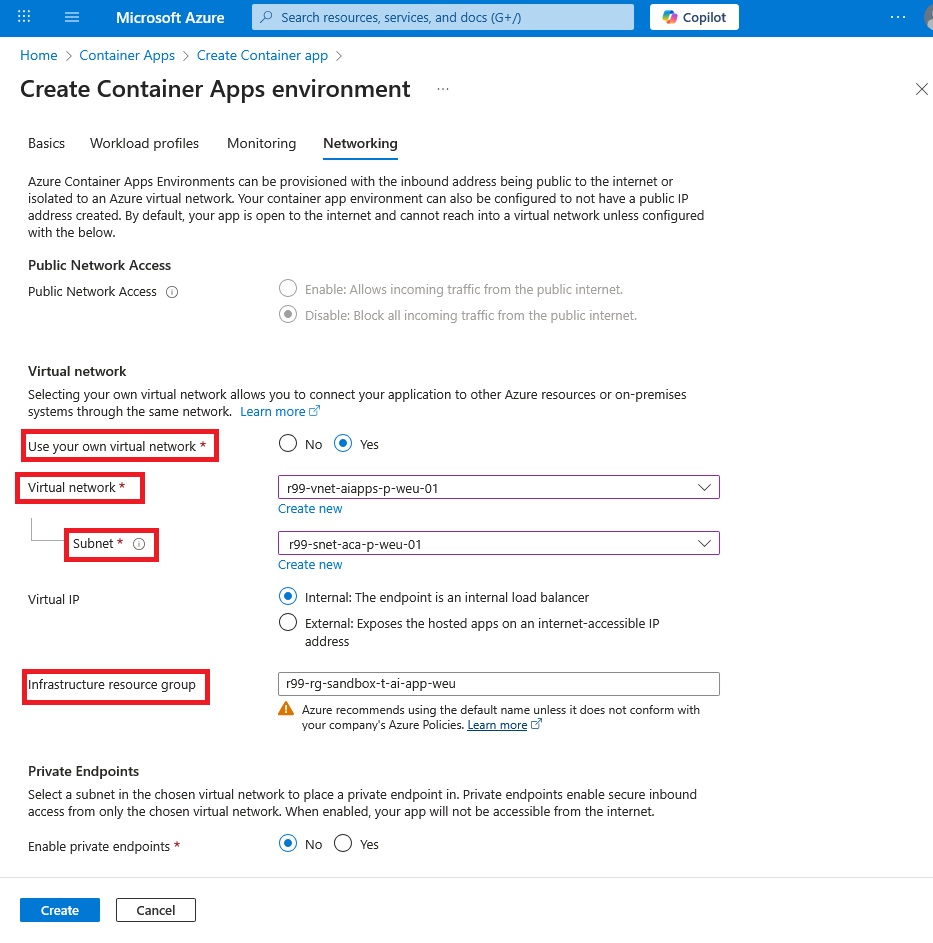
The most important section for our scenario is the Networking tab. The critical requirement here is subnet delegation: the subnet you assign to the Container Apps Environment (CAE) must be fully delegated to the container environment.
The minimum delegated subnet size depends on the environment type:
- Consumption-only (legacy): minimum /23 (498 usable IPs after reservation)
- Workload Profiles environment: minimum /27 (18 usable IPs after reservation)
This is logical: Workload Profiles environments are designed for smaller numbers of predictable, capacity-bound apps.
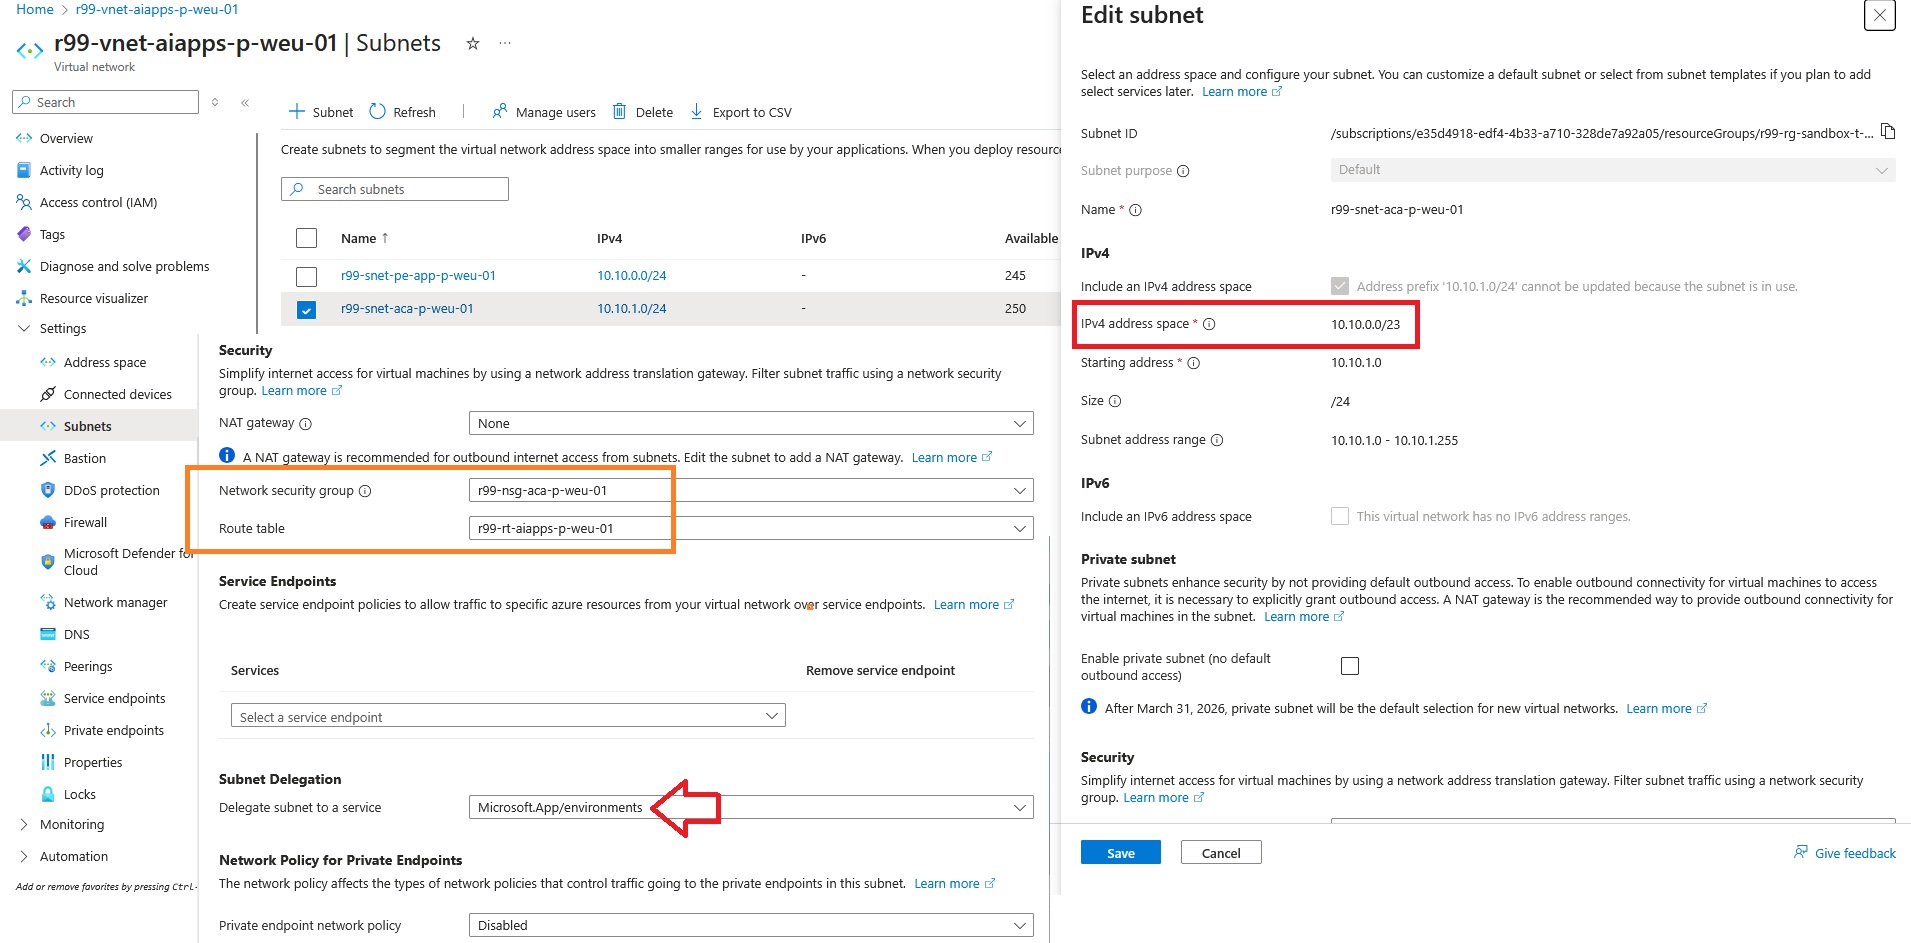
Note the address space 10.10.0.0/23 used for the CAE subnet; we will use it later when validating traffic in FortiGate logs.
The orange rectangle highlights the route table and NSG associated with the subnet used by the CAE. Let’s examine the route table and see how traffic is manipulated.
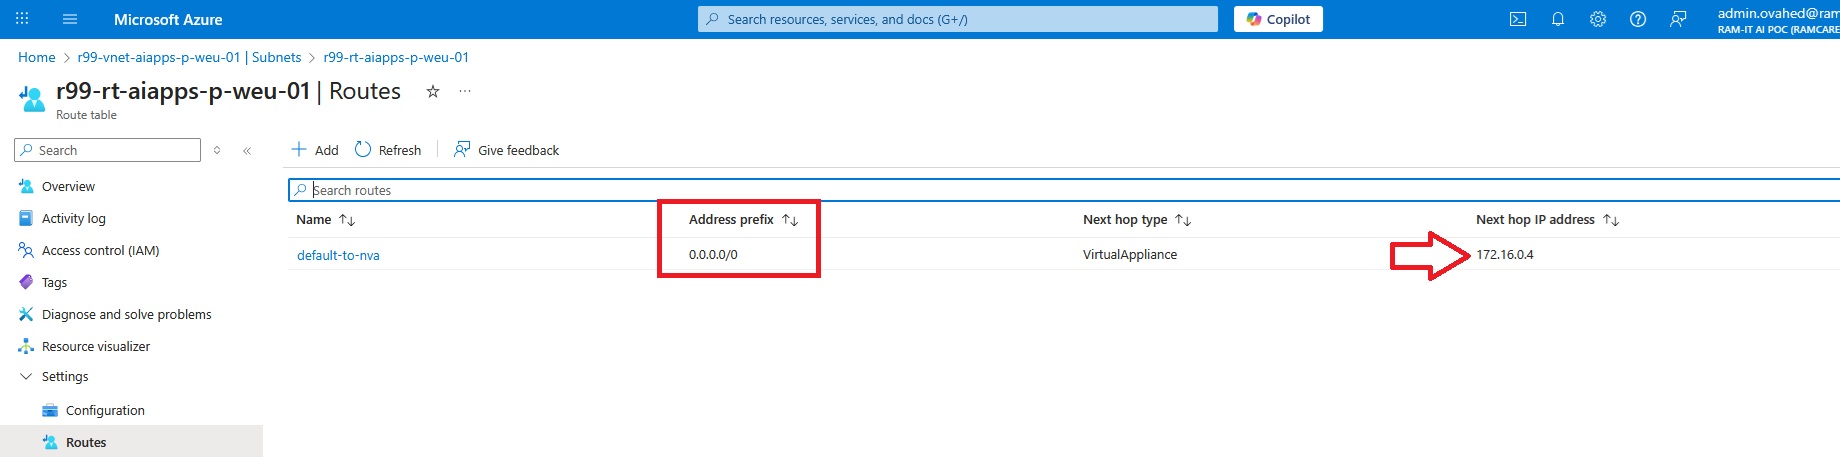
The route table shows that the default route (0.0.0.0/0) points to 172.16.0.4, which is the FortiGate firewall in the hub virtual network.
DEPLOY A TEST CONTAINER APP
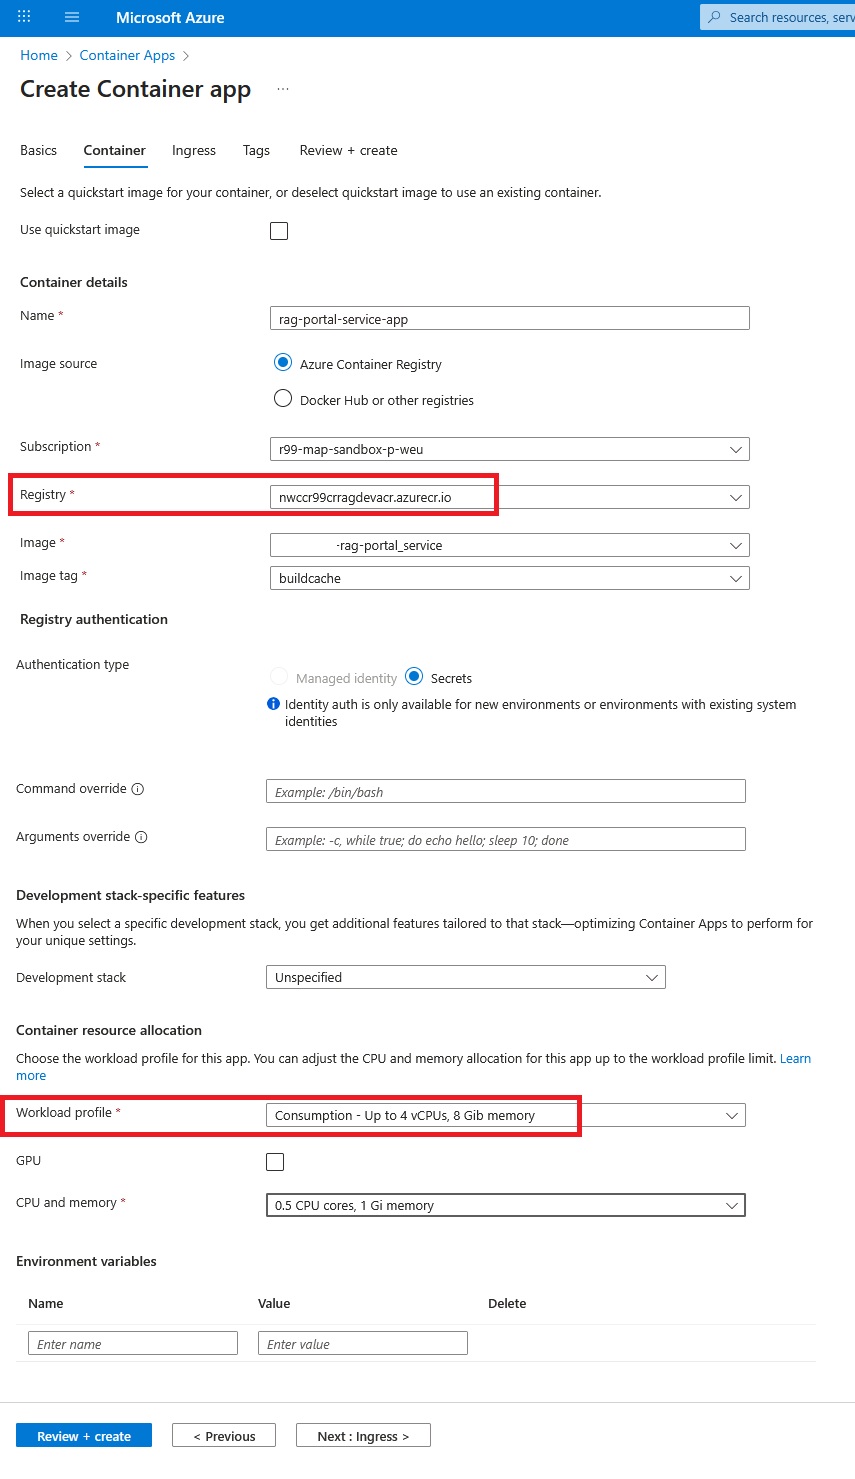
The screenshot below shows a basic deployment of a container application that we can use as an HTTPS web service for testing inbound/outbound traffic.
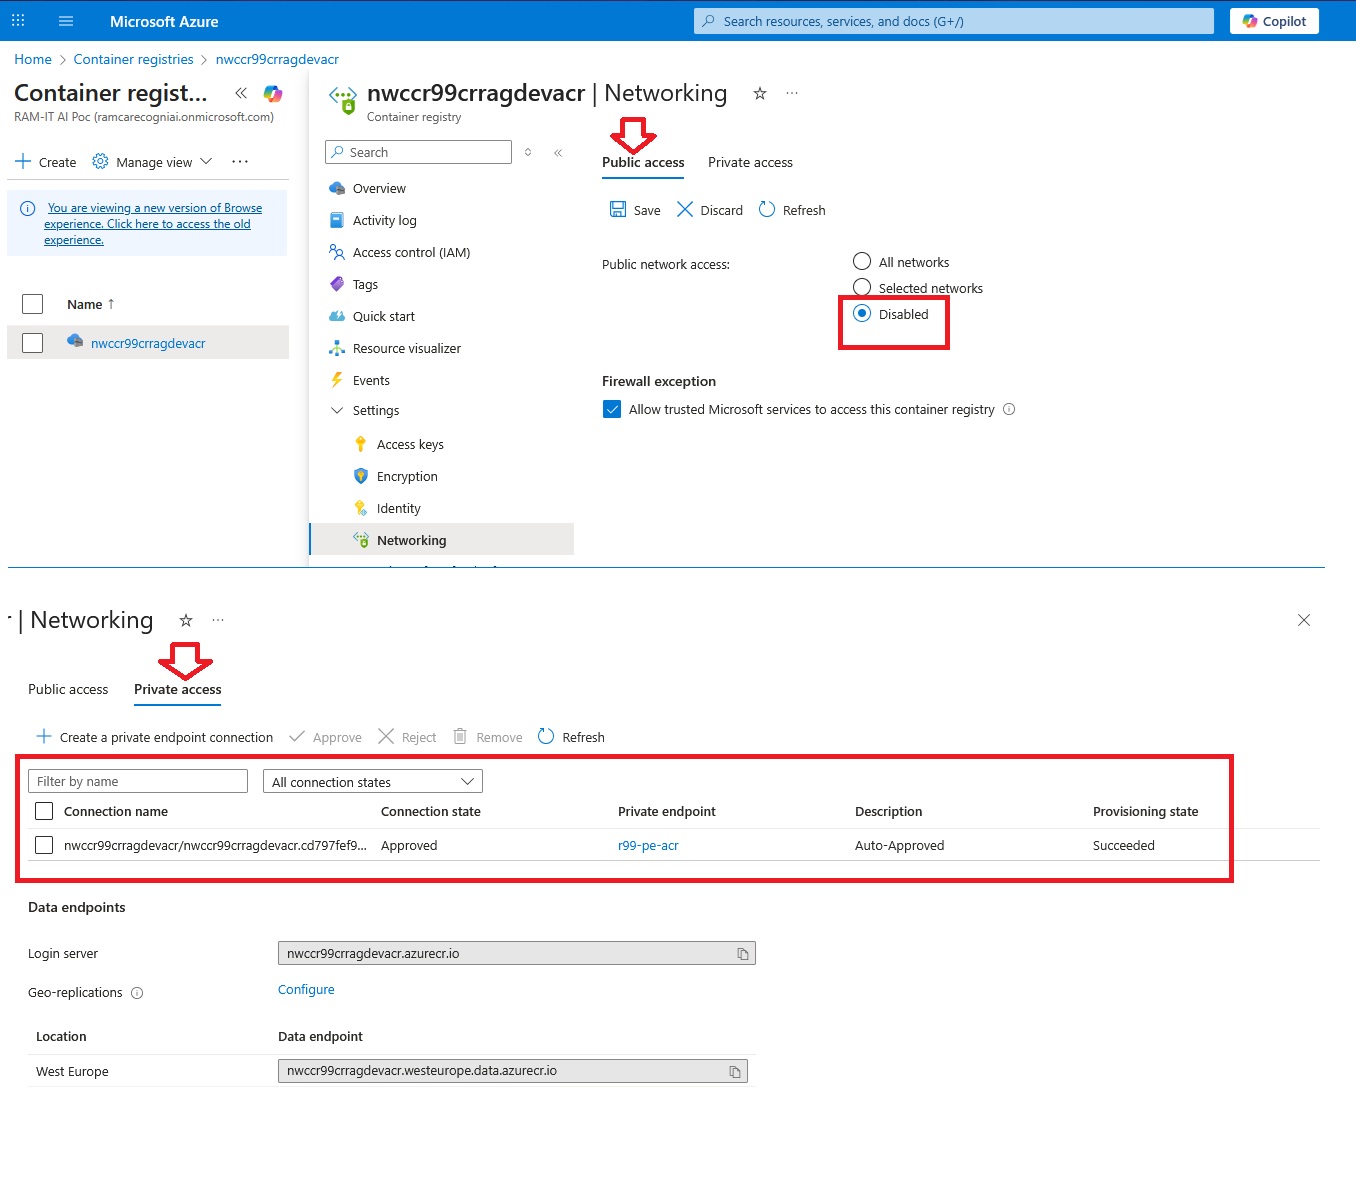
The most important networking consideration here is access to the container registry. In this setup, access is provided through a private endpoint assigned to the container registry, allowing CAE to pull images over private IP connectivity.
INGRESS SETTINGS
Next, we define incoming traffic. Since we’re publishing an HTTPS app, enabling HTTPS ingress is appropriate.
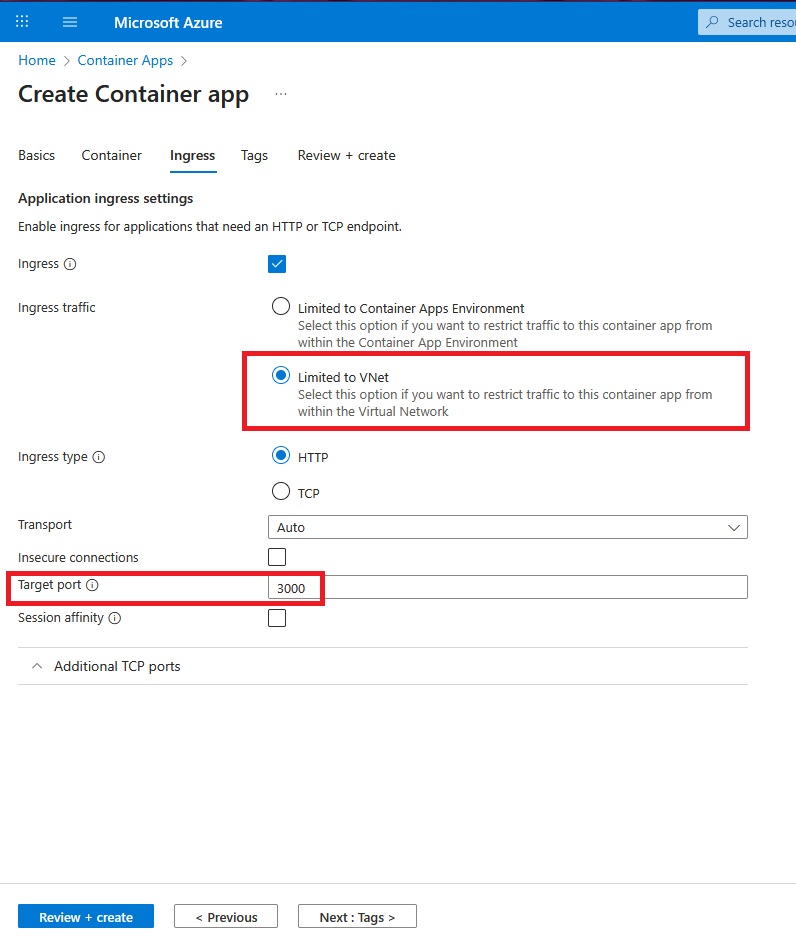
One of our objectives is to keep inbound and outbound traffic inside Azure and whitelist all internet access through the central firewall. For this reason, we restrict incoming traffic to the virtual network only. This prevents the container app from being exposed directly to the public internet.
We publish port 3000 because the container listens on that port internally. In Azure Container Apps, the port configured in ingress is the internal target port, not the external port. Azure exposes ingress via a managed HTTPS endpoint on 443, terminates TLS at the platform, and forwards traffic internally to the configured target port.
After deployment finishes, you should see the following Container Apps environment:
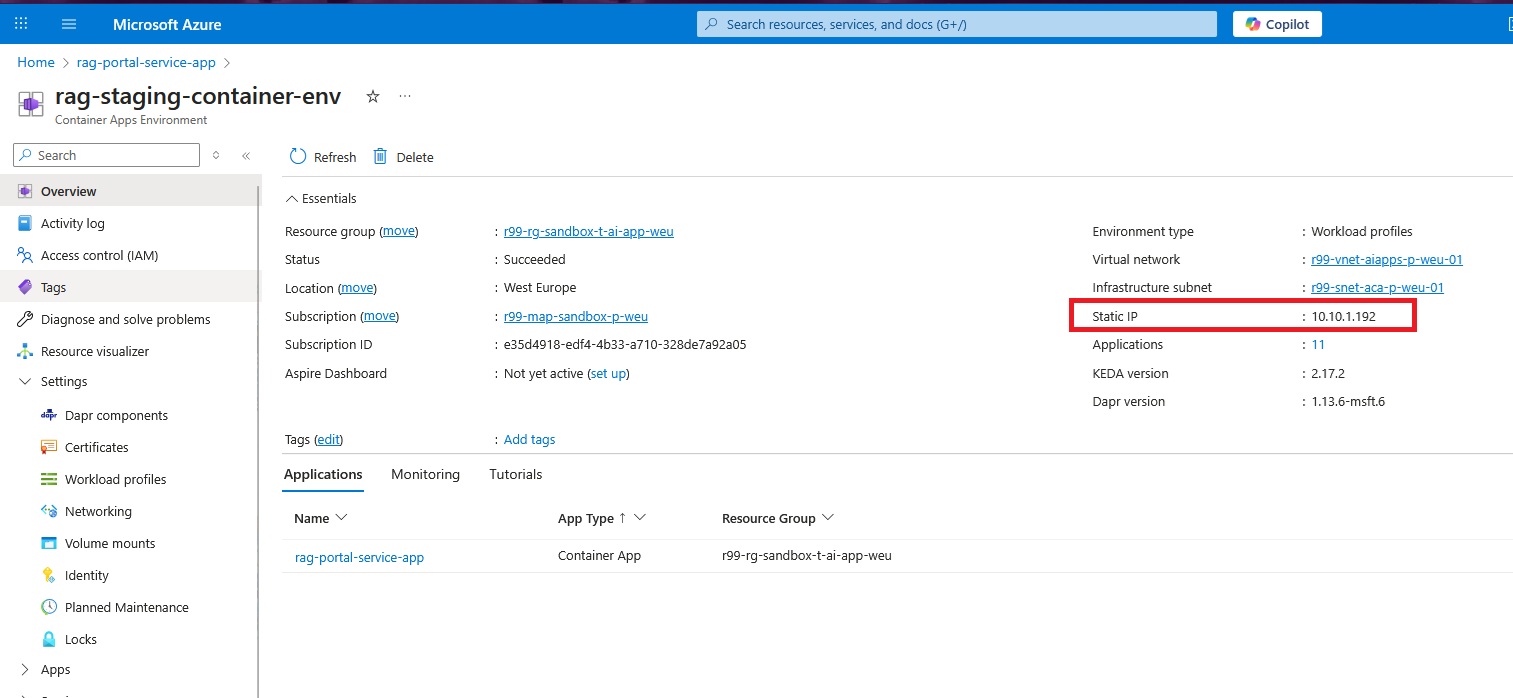
If you see a private IP from the delegated subnet (instead of a public IP), it indicates that VNet integration has been completed successfully.
TEST OUTBOUND TRAFFIC
Now let’s test outbound traffic and verify it shows up in the FortiGate firewall logs.
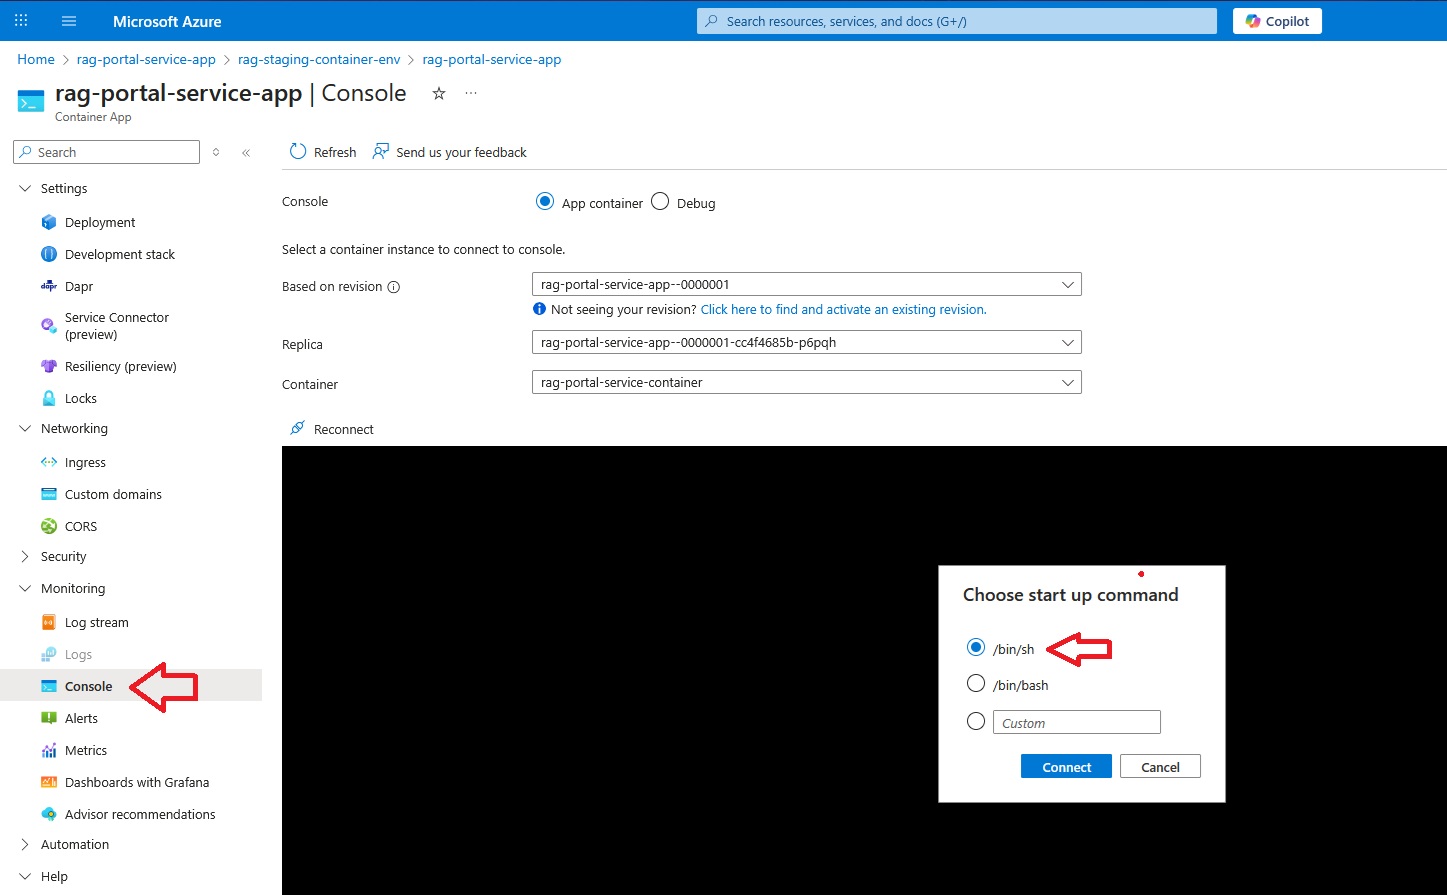
First, verify DNS resolution:
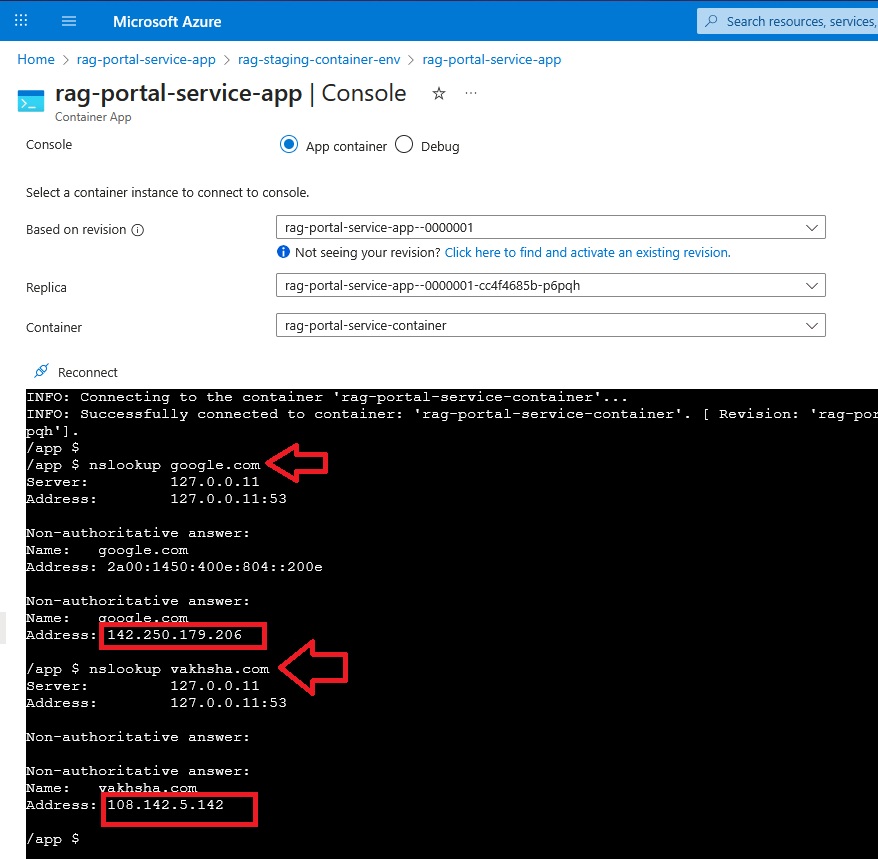
Then run a simple test request to an internet destination:
wget https://vakhsha.com
FORTIGATE TRAFFIC LOGS
Now comes the moment of truth: check the traffic logs on the FortiGate firewall.
If you are interested in deploying a FortiGate firewall cluster, you can review a dedicated YouTube playlist here.
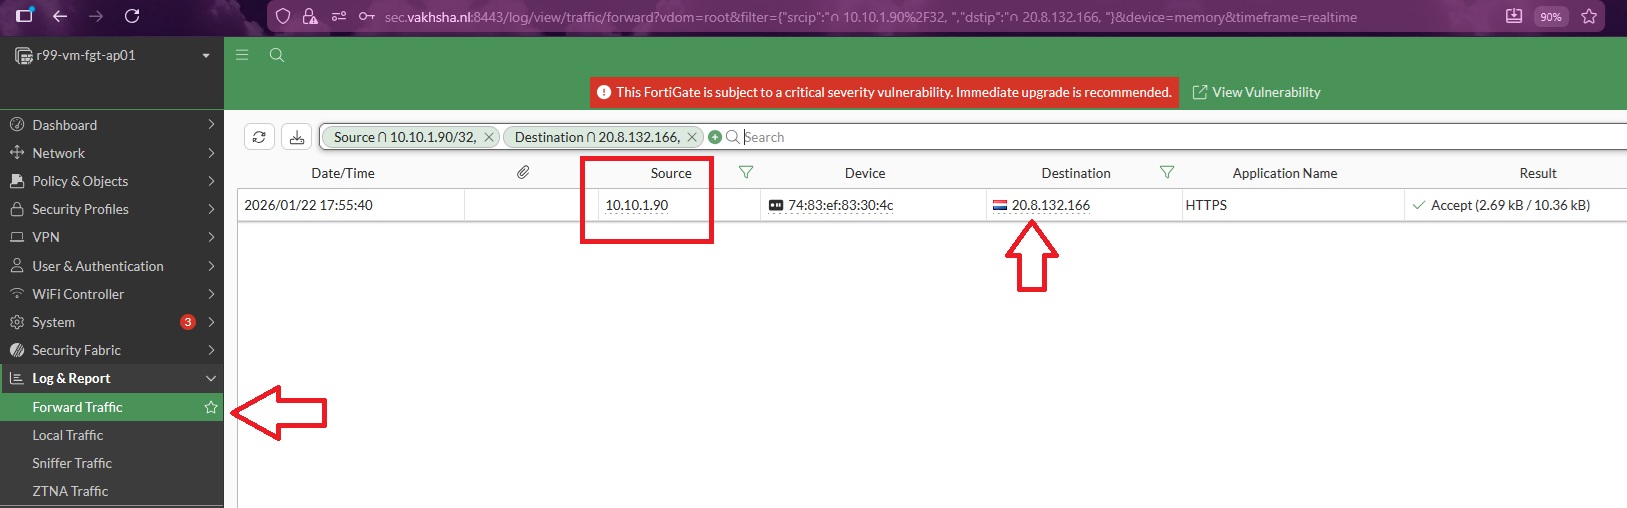
Here, the source IP address is associated with the Container Apps Environment, and the destination IP address corresponds to the address returned by the request.
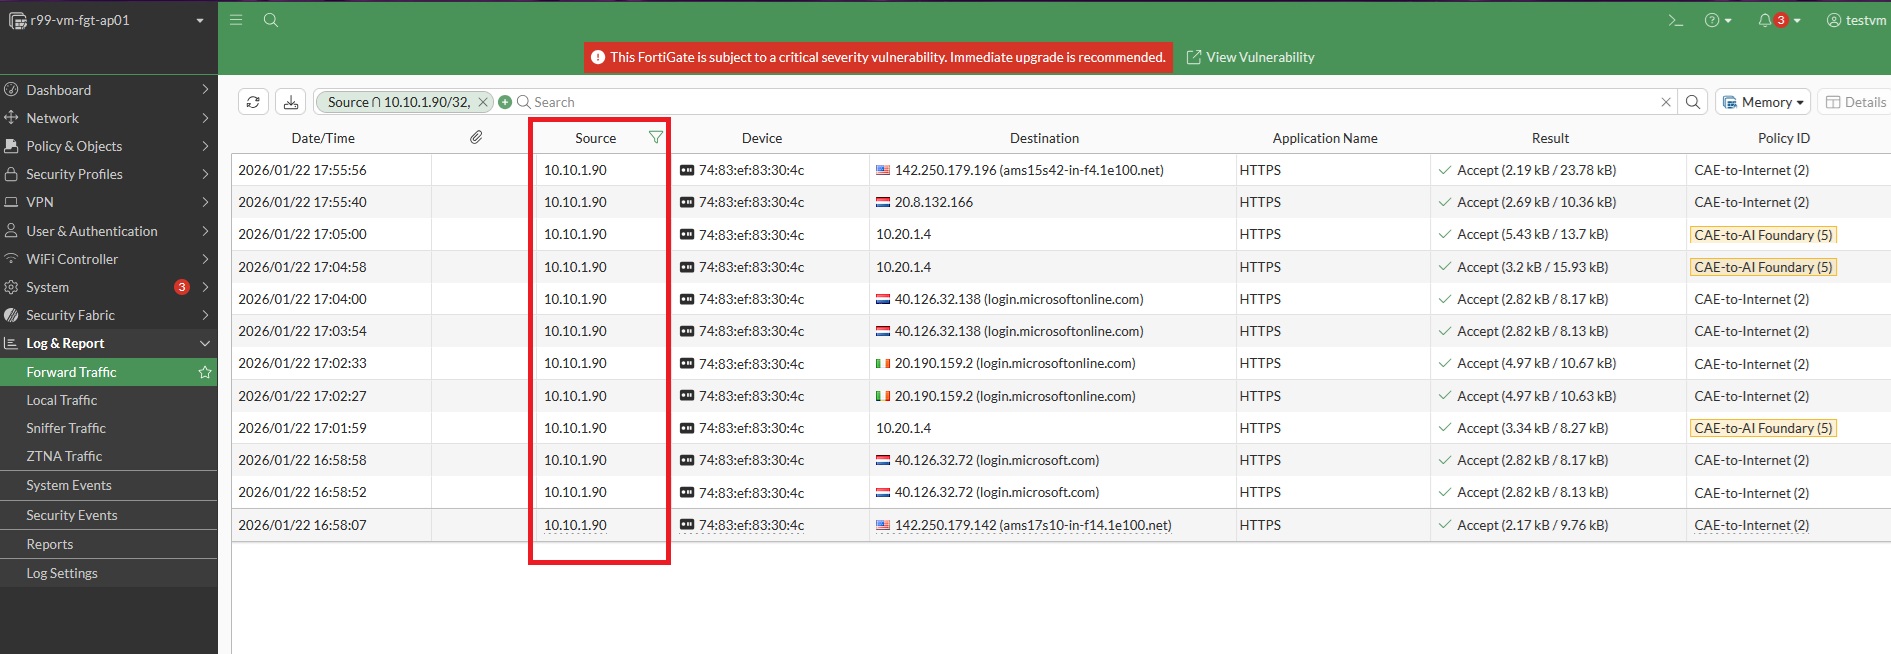
To review all outbound traffic, remove the destination IP filter:
SUMMARY
In this article, we created a Container Apps Environment (CAE), deployed a container application, routed outbound traffic through FortiGate using a default route, and validated the flows using firewall logs.
In the next article, we will publish this container-based web service through Azure Application Gateway and analyze the incoming traffic flows using Azure Log Analytics Workspace.